Hallow hallow! It's nearly Halloween. The time of the year where we like to have a lot of fun when ghosts, frankensteins, vampires are running rife. Booooooooo! Keep it spooky!
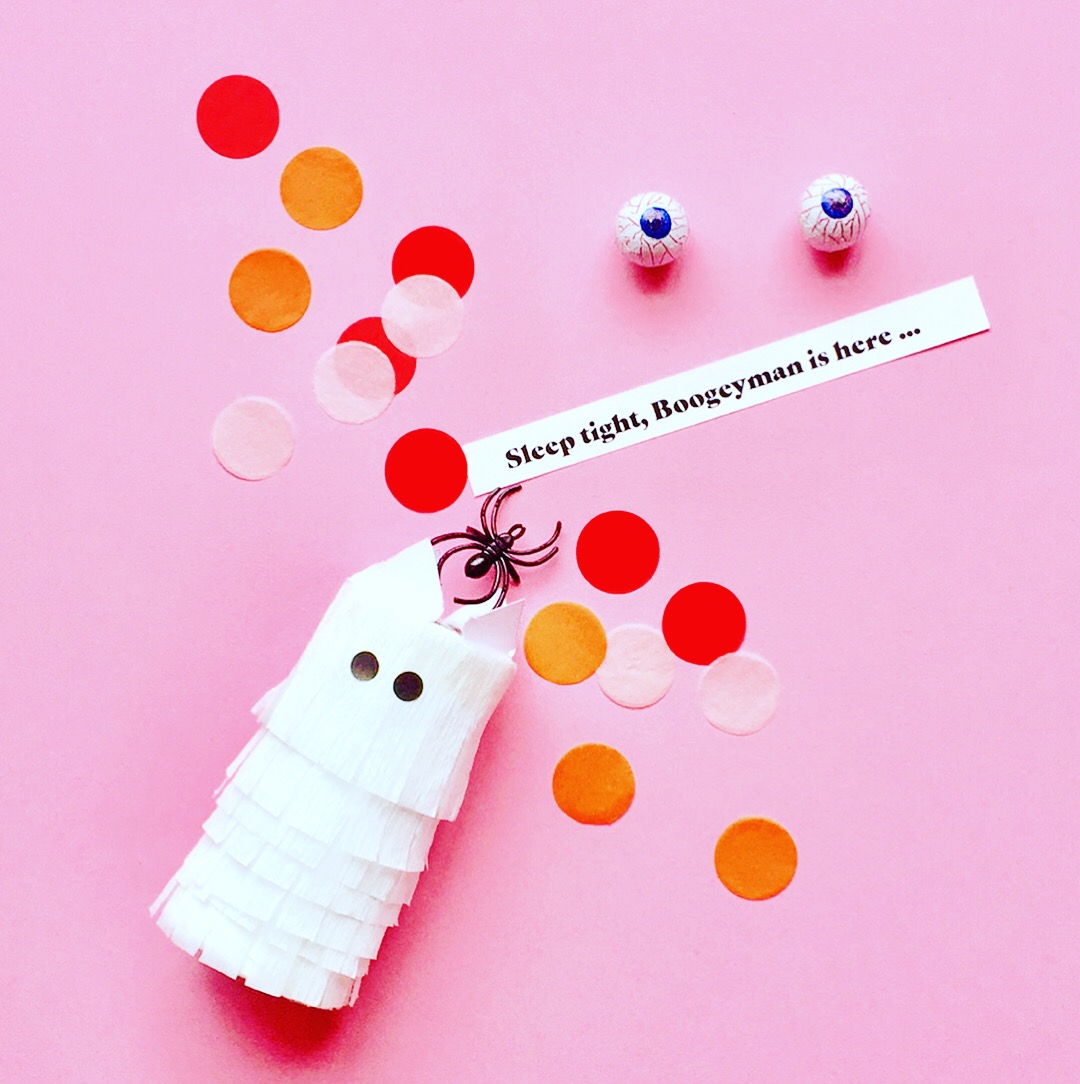
Piñatas are the way to go for Halloween, as it can combine both the trick AND treat elements (instead of trick OR treat) all rolled up together in one. FUN! These piñatas will make fab Halloween party favours, part of the decorations or place settings.
There are bound to be some lonely toilet rolls lurking around, why not reuse them and make something cute prior to recycling.

MATERIALS (to make 1 piñata)
Toilet roll
White crepe paper
A4 Paper
Treats - sweets or chocolates of choice. Snack size chocolates are perfect as well as halloween themed candies and chocolates including bloodshot eyeballs, pumpkins etc
Tricks - little scary toys such as plastic spiders, scary finger puppets, eyeballs, dracula fangs etc
Confetti - if ready made confetti is not available it's straight forward to make your own by cutting strips of paper, or teasing bits of cotton wool will work too to fill the cavity of the toilet roll
Little scary message - these could be little scary comments which could be printed or handwritten. Extra touches could include writing these notes with a red marker, or dip your fingers in red ink and write the little notes with your fingers to make it more scary.
Black round stickers for the eyes - if stickers are not available, this could be substituted with using a black marker instead to draw the eyes of the ghosts on the piñata
TOOLS
pencil
scissors
double sided tape
white masking tape / washi tape

METHOD
Place the end of the toilet roll on top of an A4 piece of paper. Use a pencil to trace around the toilet roll. Draw a larger circle around the first circle, around 1cm larger. Cut around the larger circle. Make fray slits around the circle by cutting from the larger circle into the border of smaller circle. These fray slits will help to bend the larger circle over one end of the toilet roll and act as a lid. Repeat this step as there needs to be 2 lids to secure the ends of the toilet roll, one lid for each end of the toilet roll.
Use white masking tape or white washi tape to tape one of the lids on to one end of the toilet roll. Make sure the lid securely covers the complete end of the toilet roll.
Fill the toilet roll with goodies. Confetti, little spooky toys, candy and chocolate treats and include a spooky message.
Take the second lid that has been made in step 1, and tape the lid to the open end of the toilet roll. Now both ends of the toilet roll should be closed.
Take the crepe paper, wrap it around the toilet roll widthwise, to estimate the length of crepe paper required to cover the circumference of the toilet roll. Cut around 8 strips of crepe paper and fringe the edges. Start from one end of the base, stick white fringe crepe paper onto the toilet roll using double-sided tape. Repeat until the whole toilet roll is covered with white fringe crepe paper.
Peel off 2 circle black stickers, add onto the roll to make eyes for the ghost. Alternatively, a black marker could be used instead to draw the features of the ghost piñata. Whahey, a ghost piñata, repeat to make more! Distribute the spook.
Happy Halloween! Show off your BOO-tys and have a spooktacular one!
P.S. Other treat option, Frankenstein Frank Halloween Treat Bags


